
Supply List:
*Transparency-the type of transparency is VERY important. I use 3M Write on Transparency Sheets from Office Depot. If you go to Staples or some other office supply store their brand is more flimsy. It will warp under high heat. Also if you make your own pearl flourishes it's harder to hold and cut.
*Versmark Pigment Ink Pad
*Embossing Powder
*Alcohol ink and Mixative
*Embossing gun
*Stamp- acrylic or rubber
Step one:
Cut a square piece of transparency. Obviously bigger than your butterfly.
Put about 3 drips of alcohol ink and 2 dots of a mixative on the transparency.
Here I used Slate Alcohol ink and Silver Mixative.
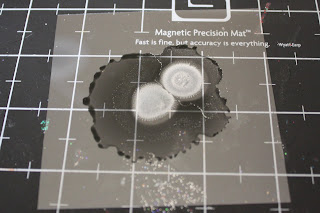
Step 2:
Blend the alcohol ink and mixative together large enough to fit your stamp.

Step 3:
Ink up your stamp with the Versmark

Step4:
On the backside of the transparency stamp your image. Now, I say the backside because if you stamp on the front with the alcohol ink it may stain your stamp. Also it's smoother on the backside.

Step 5:
Sprinkle your image with Embossing Powder. Here I used Silver Embossing Powder.

Step 6:
Heat up the embossing powder with your heat gun.
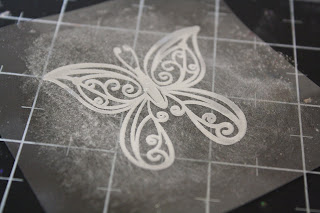
Step 7:
Cut out your image. See, super easy!!! * Thank you to my "Hand Model" Cleapatra*

Here I used Red Pepper Alcohol ink and black embossing powder.

and here....Eggplant and Gold Embossing powder. Possibilities are endless!!!!
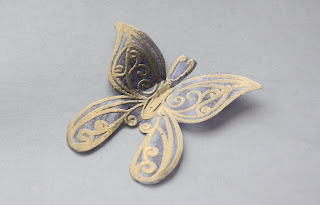
Here is the layout I used with the butterflies.

I added Prima pearls for the body for the finishing touch.

Not only do I love Alcohol ink, I totally love Glimmer mist. Here I used Silver Glimmer mist on the white flowers.

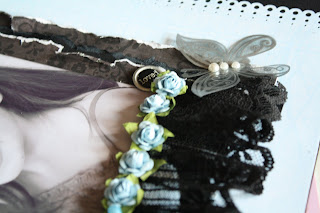
Oh, and guess what??!! I finally got Photoshop. I figured out to leave Cleapatra's eyes blue and the rest of the photo black and white. I soooo love this effect and been wanting to do it for YEARS!!!! So, most likely I will be editing many of my photos this way...lol!!




10 comments:
Angelica, thank you so much for the tutorial! I am most definitely going to try it!
Hi, I think it might have been Stuck on you Sketches (sous) http://stuckonusketches.blogspot.com/2010/01/happy-new-year-butterfly-tutorial.html They have a few great tutorials on their blog.
Thay Are Gorgeous!!!! Love the Angelica!! Thanks for the tutorial!
Thanks for the link, but that wasn't it!!
Thanks Angelica! I will definitely have to try this. I love your blog and your work!
http://scraptacularimages.blogspot.com/2009/11/butterfly-tutorial.html
I think this is the blog you are looking for!
WOW Ang, those butterflies are beautiful! I love the look of the first one especially. tell your hand model she did an excellent job too!!!! Love your newest work!
Thanks Auntie Em!! That is it!!!
WHat a fun technique Angelica, I'm going to have to give these a go! Love your l/o too!...Cleapatra is so beautiful, awesome that you got your photoshop working!...I've had photoshop on my computer for ages and still haven't learned to use it!....still using my old reliable Photosuite lol!
~Gabi xx
Thank you so much for sharing your creative ideas. They are clear and "do-able." My pages have really come alive. Really looking forward to the Drawing coming up. Absolutely love all the fabulous bling, pinks, and would love to try the Angel Dust.
Post a Comment